For my personal travel and family photos, I’ve started a new photos workflow, and I thought other people who are beginning their family photo journey like I have in the past few years might be interested.
The premise of the workflow is that photos begin on my iPhone, Britt’s iPhone, or my Sony A6400. They are processed, and then iCloud Photo Library is my one true family photo library.
I’ve put loads (months) of work into clearing and culling that library down to about 21,000 photos now, and just recently finished geotagging every single last photo in the library using Metapho.
Because I like the idea of capturing as much data as possible so I have wiggle room afterward, I shoot on my iPhone and Sony A6400 in RAW, and previously I’ve used Lightroom to process photos then export to Photos. Recently however I’ve moved processing to Darkroom. I wasn’t comfortable with paying for Lightroom CC storage, and then having to make decisions about keeping originals either on a hard drive, or to increase my subscription and size for Adobe’s Cloud, so I’m keeping them in Apple’s iCloud - a product I already use and pay for.
The workflow simply looks like this:
1. Import: I import the photos to my iPhone’s camera roll. If I’ve already taken photos on my phone, they’re there. I ask Britt to Airdrop her photos to me. For photos from my camera I have the Apple Lightning to SD Card adapter, and import the raw DNGs straight into the camera roll.
2. Cull: I delete photos I don’t think I’ll keep. They stay in the Apple Photos deleted items for 30 days, more than enough time for regret to realise itself, or for me to realise I never needed those photos anyway.
3. Process: I open Darkroom and because I’ve got access to my Photos library within Darkroom I can edit these new photos as I like. Darkroom has some great inbuilt presets and you can build your own as well.

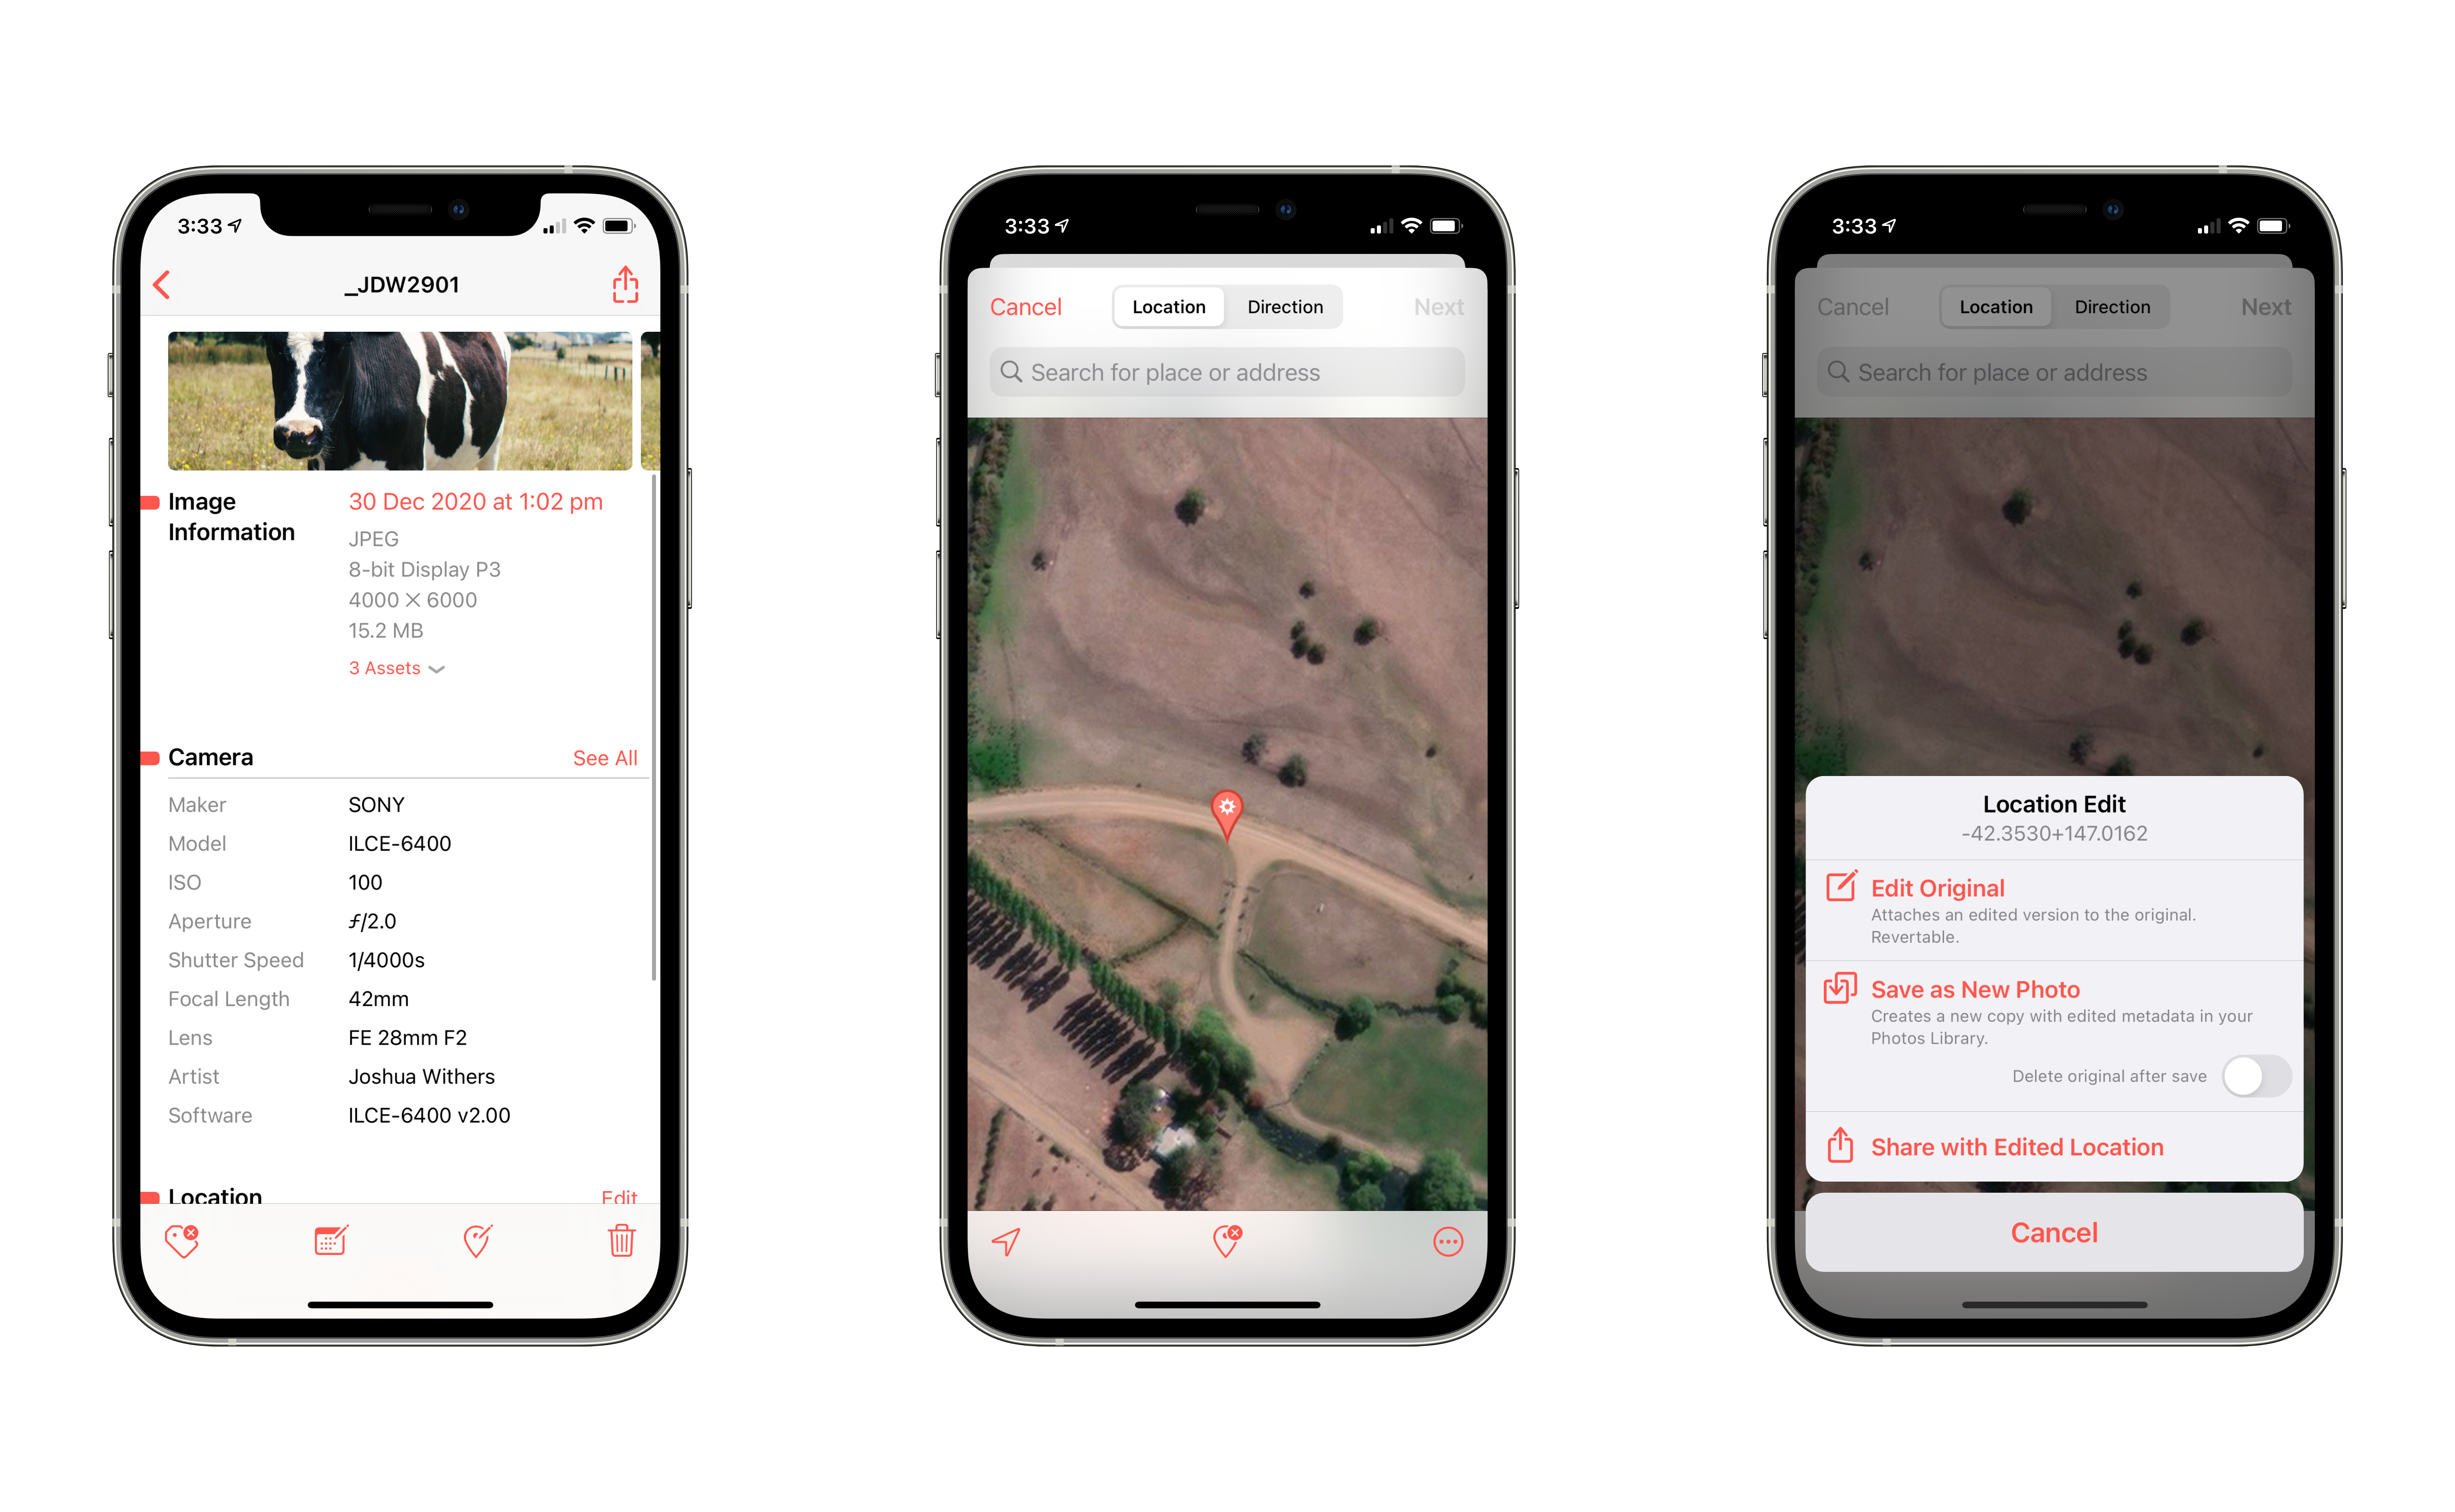
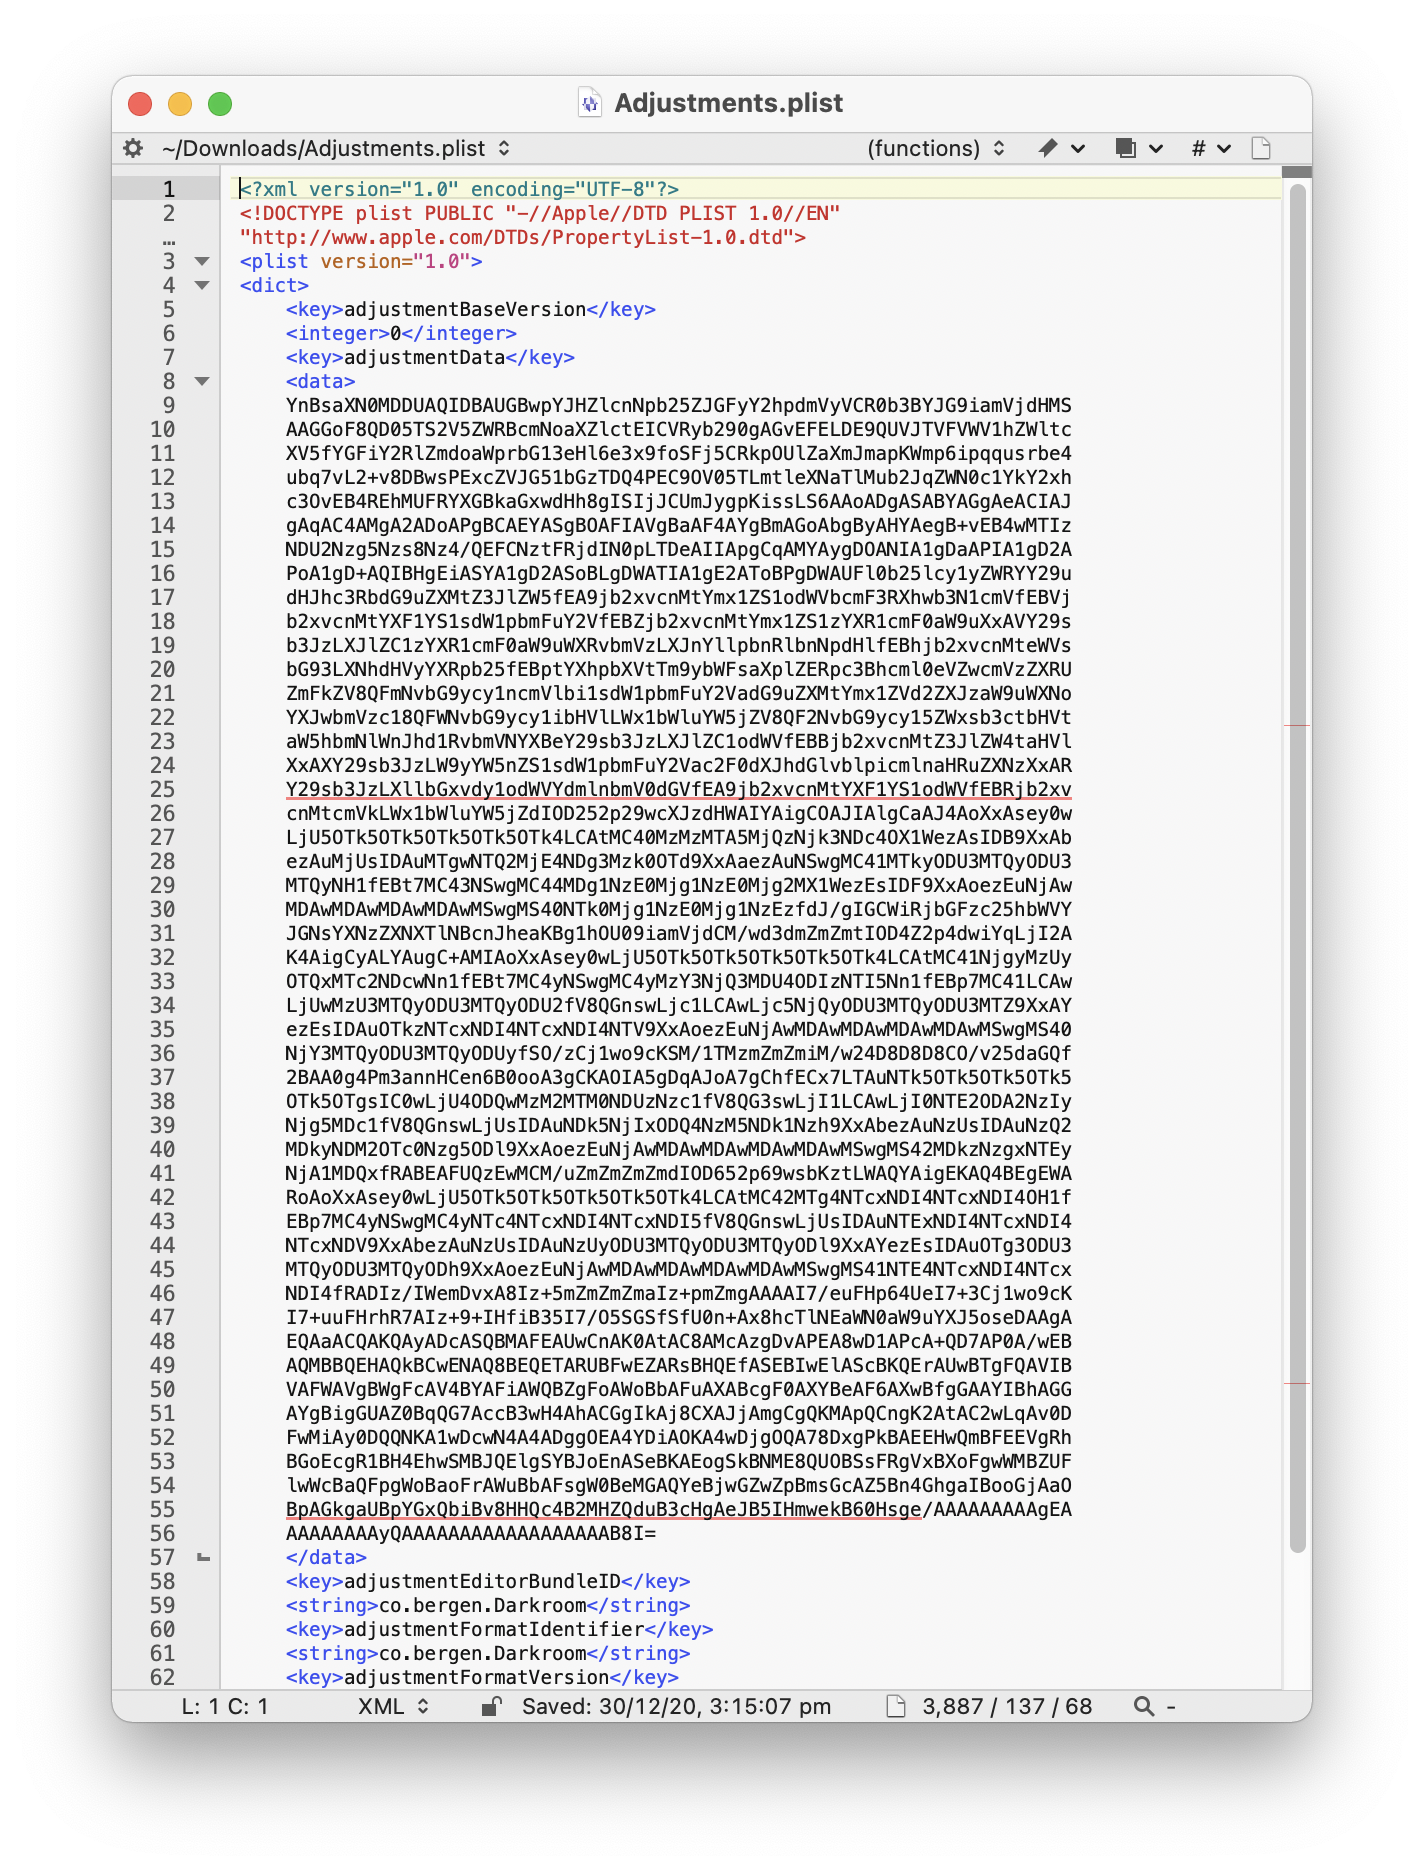
4. Modify Original: Once I’m happy with the crop, straighten, clour grade, edit, and what-not within Darkroom this is the impotant step. In the top right hand corner is the share icon, and I choose “Modify Original” so that the adjustments are stored inside the image file. It’s actually not stored inside, it’s essentially a little zip file, with the .ARW raw DNG file from the camera, a .plist file with the adjustments made in Darkroom, and then a rendered .JPG which is the image we all see, share, and enjoy. This means that there is a package in the iCloud Photo Library which containts those three files, totallying 40.4MB, instead of maybe 15.2MB. I don’t know why this is important to me apart from my inner burning knowledge that once data is gone, you don’t get it back.

5. Location, location, location: Aside from the image itself, there are three pieces of metadata important to me. The first is the location, the geotag. I love how Apple Photos brings you memories inside the Photos app, and also on my homescreen using the new iOS 14 Photos widget, and those memories are often location related. So I use Metapho as discussed at the top to assign a geotag to every photo that doesn’t have one. Metapho is smart in that it looks at images shot at the same time and date and tries to help by pivoting off that data. Photos taken on my iPhone generally already have a geotag, and photos taken on my Sony might be geotagged if the terrible Sony Imaging Edge app was working that day. Images taken inside often have a slightly incorrect geotag as well, because GPS doesn’t work in the house, so I’ll correct those images.


6. Who’s in the photo?: This step needs some time, because your iPhone literally needs to be plugged in, and in sleep mode, generally overnight, sometimes for a few nights. The process is about allowing Apple Photos to read your photos and detect faces. This all happens on device and at its own pace. I’ll go back to photos and see what faces have been detected and I’ll assign, or re-assign, the person name to that face so I could then search for photos of someone and find all of those photos in once search. This also adds into the memories feature. If Apple Photos hasn’t detected a face after a few days and I’m feeling pedantic, I’ll open Photos on my MacBook and in the Get Info window you can add faces manually.


7. Captions and Albums: I’ll be honest, I have been lazy in this arena, but my goal is to caption photos accordingly, and if possible to also group them into manual albums based around events.
8. What if they’re professional photos?: We take as many opportunties as we can to have our photos taken professionally, and those photos are often delivered weeks later, often with not-correct date or time information, and with no geotag. I’ll import all of these photos to my Apple Photos app and manually correct date, time, and geotag using Metapho.
9. Backup: A final and important step is to make sure that Apple Photos on your device, and iCloud Photo Library in the cloud isn’t the only place these photos exist. You always need a backup. Mine is Google Photos - which I regret - and also in Backblaze. Ideally I’d have a physical backup but I’m just not there yet. A really good backup is to also print the photos. You’ll never regret hanging them on a wall or having the prints available to thumb through, like this photo of me as a toddler hanging at my aunty’s house.

I hope this helped you formalise some sort of photo workflow for your own family and travel photos. It might not seem important today, but I can’t kick the feeling that in 30 years time it will really matter.